Suzuki GSX-S750 (2017) - Long Term Review


By John Milbank
Consumer Editor of Bennetts BikeSocial
05.05.2017


Part 1 - What we learned in the first 500 miles.
First published 5th May 2017 - Author Steve Rose
 - first ride and review")

£7,699
112.6bhp
213kg
TBC
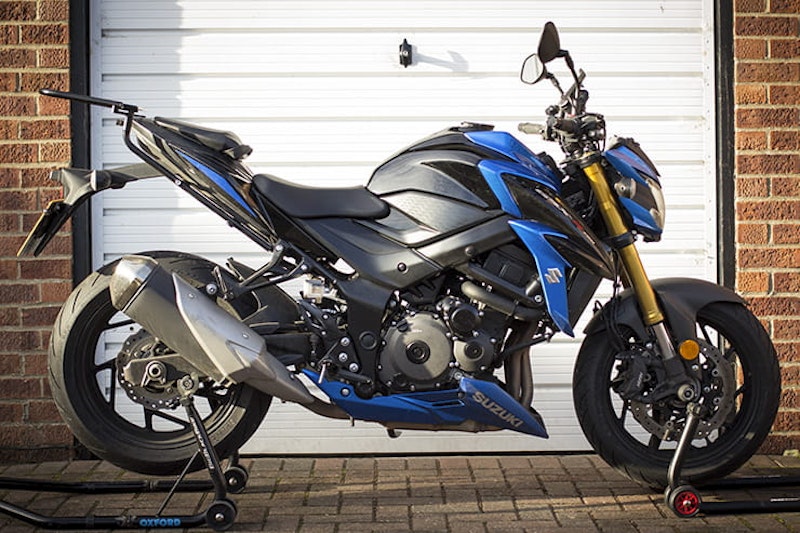
BikeSocial is running a Suzuki GSX-S-750 as a long term test bike this year. It arrived with 11 miles on the clock. Five days later it’s already slightly overdue its first service. Here’s what we learned so far:
It’s not slow
Even during the first 200 miles, keeping to a 6000rpm limit, the GSX has enough poke to out-accelerate other traffic and cruise at motorway speeds in top. 750cc is that magic capacity where there’s enough low-down power for lazy short-shifting, but fast enough pick-up when you crack the throttle open to get a move on too. Four teeny pistons will always spin up faster than two or three larger ones, so it feels buzzier and thrashier (is that a word?) than a twin or a triple.
With more miles we’ve added a few more revs and are starting to see what the Suzuki will do. Hang onto the lower gears for longer and be brave enough to use more of the throttle and it’s obvious there’s some serious speed in this bike. The spec-sheet numbers might not impress the sporting Billies on the litre-plus megabikes, but on this (experienced) rider’s ‘wide-eyed-ometer’ the GSX feels more-than fast enough when you stretch the cable (wire?).
Once the first service is done and we can really open it up I’m really looking forward to finding out how fast I can go for £7650.
It’s easy to ride
Suzuki know how to make a bike easy. Their clutches are always light, throttle actions too. Gears select smoothly, brakes are progressive, but powerful, switchgear is where you expect to find it and clocks are easy to read. It sounds simple, but you’d be surprised how many manufacturers get this stuff wrong. And it matters because every split-second not thinking about what you are doing and where you are looking is a moment that slows you down or robs concentration. Good ergonomics are the unsung heroes of safer, sporty riding and generally, the Japanese do it better than anyone. I still remember how Triumph’s first generation Street Triple was a brilliant bike spoiled by a clumsy right hand footrest that didn’t let me control the back brake how I wanted to and it annoyed the heck out of me. This stuff matters and the GSX has got it spot-on.


It’s agile, but stable too
The riding position is sporty, but upright. Footrests have been raised from the previous GSR750 for added ground clearance, making the GSX more focused, but still just about comfy enough over distance.
The wide handlebars make it easier to flick the bike aggressively into a corner, but they also allow lazier, easier steering when you’re more gentle with your input. The steering feels sharp and accurate, but not at the expense of stability. So far our enthusiastic running-in on bumpy, rural backroads hasn’t provoked any wobbles or tankslappers – not even a tanktickle. Hopefully that’ll continue when we start to get a bit friskier with the volume control.
It’ll make a great commuter too*
All that stuff above about the smooth engine, light clutch and easy controls make the Suzuki brilliant in traffic. It glides through the smallest of gaps and little things like the mirrors being tall enough to clear those of most cars mean you can be optimistic about your hole-hunting and make it through most (ahem) of the time unscathed. The traction control comes in early on setting ‘One’ but it doesn’t feel intrusive and I left it in that mode for much of the time. The ABS is effective, but, again, not overly intrusive, and, in gentle, town riding, the GSX was giving 64mpg, which is about 200 miles from the 16 litre tank. Even in half-thrashed, running-in mode I was still getting 54mpg.
*There is a ‘but’. If it’s been a while since you rode an unfaired bike be prepared to be surprised how much colder and wetter you will be. Even in mid-April, wearing my full winter clobber I was cold enough to need a break after 50 miles. Hands, arms and neck were all getting chilly, heated grips would (will) make a huge difference.


It’s not perfect
Suzuki’s marketing describes the GSX as an ‘Apex Predator’, whatever that is. Presumably they are saying that the GSX handles, which it does…very well…sort of. But, as we were saying earlier, just as you can count on Japanese manufacturers to get the ergonomics so right, you can equally count on them (Honda aside) to save a few quid by fitting rear suspension that isn’t quite up to the job. Cornering hard on a GSX has the back-end bumping and bouncing out of line right at the moment when you need to focus, like the rear shock has the wrong spring rate or damping setting (or both). It’s annoying, not dangerous, but it should be better. Yamaha’s original MT-09 was the same (since fixed for the 2017 model), and plenty of Kawasakis too. Once run-in we’ll spend some time playing with set-up to see if we can tune it out. If not, we’ll make it part of the long-term plan to see if we can improve matters within a sensible budget.
And budget is important because the GSX-S-750 has some tough competition at similar prices. Triumph’s new Street Triple S and Yamaha’s revamped MT-09 are too close to the Suzuki’s £7650 price for comfort and Honda’s already-great-but-revamped-for-2017 CB650F is a whopping £1000 cheaper.
Next steps
Get the first service done, put the bike on the dyno, look into alternatives to the ‘not-too-pretty’ standard exhaust, add some heated grips and play with suspension set-up to look for smoother cornering performance.


Part 2 - Old School Tech for the Win
Updated 9th June 2017. Author - John Milbank

After just ten miles, I absolutely loved this bike.
Okay, in the spirit of long-term testing, where a manufacturer loans us a bike for a good chunk of the year, this isn’t exactly a ‘living with it’ review, but after 300 miles in the first week, I’m still very impressed.
Suzuki’s GSX-S750 is essentially an upgrade to the GSR 750, restyled with new plastics, headlight and tail. It’s also got new clocks, wheels and swing-arm. The frame’s the same, but if it ain’t broke, why fix it?
And that’s the point with the engine – it’s derived from the 2005 GSX-R750 motor. Which is A Very Good Thing. Euro 4 emissions regulations have seen some manufacturers look to all-new power plants. Others have battled on, trying to work around the restrictive exhaust systems, but this is something else…
The original GSX-R750 K5 made a claimed 142bhp @ 12,800rpm and 64lb-ft @ 11,200rpm. Suzuki says the new GSX-S makes 113bhp @ 10,500rpm, and 60lb-ft @ 9000rpm. I’ll be comparing the two bikes next time on the dyno, and sure, the new machine makes 80% of the power, but it peaks at 82% of the revs. Torque is 94% what it was 12 years ago, but it’s happening at 70% of the revs. Looks like all the talk of a more useful road engine isn’t just a load of (bureaucratically stifled) hot air…


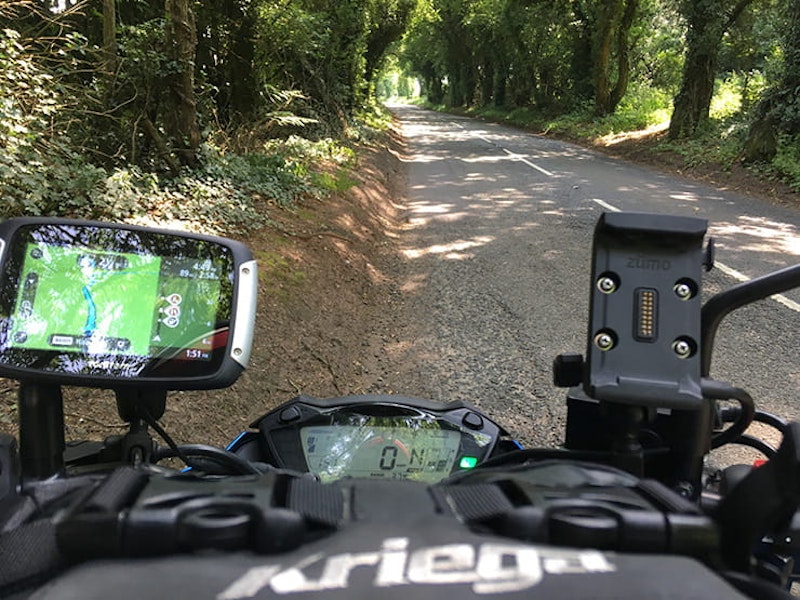
Ignore the two sat-nav mounts – I’m not that prone to getting lost; I’m just comparing them
I love 100bhp
In Bike Social's original review of this machine, tester Jim Lyndsey said he reckoned the rear-wheel performance will be about 100bhp, which is just right for the road. I couldn’t agree more; as the owner of a KTM 1050 Adventure (which on the dyno makes 99bhp), I rarely find myself wanting more.
I love a bike that you feel you can work hard, but not be reaching silly speeds. Something that gives you the drive out of corners – the acceleration that makes bikes so much fun – without propelling you into court faster than you can boast about your Panigale making more power than an R1.
Despite many journalists returning full of praise from the GSX-S’ rainy launch, I didn’t expect to like it this much. It’s not the suspension, which adjustable only for preload, feels great on smooth roads, but pretty harsh on less carefully-surfaced Tarmac (I’ll have a play with the adjusters over the coming weeks). It’s that engine. Or more specifically, the noise it makes.
I remember GSX-Rs as having a banshee wail that epitomised what sports-bikes meant when I started riding in 1996, and this thing doesn’t sound any less awesome. Through a combination of clever air-box and exhaust tuning, the GSX-S winds itself up into a frenzy that goads you into twisting the throttle back that little bit further. It’s lucky then that it’s not stupidly fast.
The Suzuki is still plenty quick enough though, and I’m needing to keep myself in check a little more than I would on my torquey KTM, but 749cc seems to be the perfect capacity for a street four-cylinder. Having ridden the new Fireblade and Yamaha R6 back-to-back recently, the 600 was great fun, but needed a bit more commitment, while the ’Blade was just too fast for my road riding. I loved that Honda during the launch at Portimao, but on the road, even in second gear, I was into licence-losing territory before the motor really started to get interesting.


Being practical
At 5’10” and after tip-toeing around on my KTM, I’m appreciating the Suzuki’s 820mm-high seat, which allows me to easily plant my feet on the ground. The bars don’t make my wrists ache, and the pegs keep my ageing knees comfortable.
There’s no fairing, which I miss in the pouring rain, but wind blast isn’t a major problem. The clutch isn’t hydraulic, but the cable’s smooth, and the action light enough. There’s a decent amount of space under the seat – more than enough for a disc-lock and much more – but there’s nothing stopping smaller items from falling down into the battery area; to get to that, you need to remove the two side panels (one Allen bolt each) and the seat (two more).
£7699 is £30 less than a Triumph Street Triple or a Yamaha MT-09, and depending on where your allegiances lie, that might not be enough of a difference to sway you from your favourite brand. But the GSX-S is a surprising bike, and I’m looking forward to some long journeys, commuting every day, and a bit of time on track. I know I won’t be the hooligan I once was on my first CBR600, but I think it might be time to swap the textiles for leathers again…


Riding 60miles through torrential rain is more fun when you have a screen…
2017 Suzuki GSX-S750 first impressions

Don't expect high-end production values, but if this gives you half an idea of how good the bike sounds...
Part 3 - The Longest Day
Updated 28th June 2017. Author John Milbank
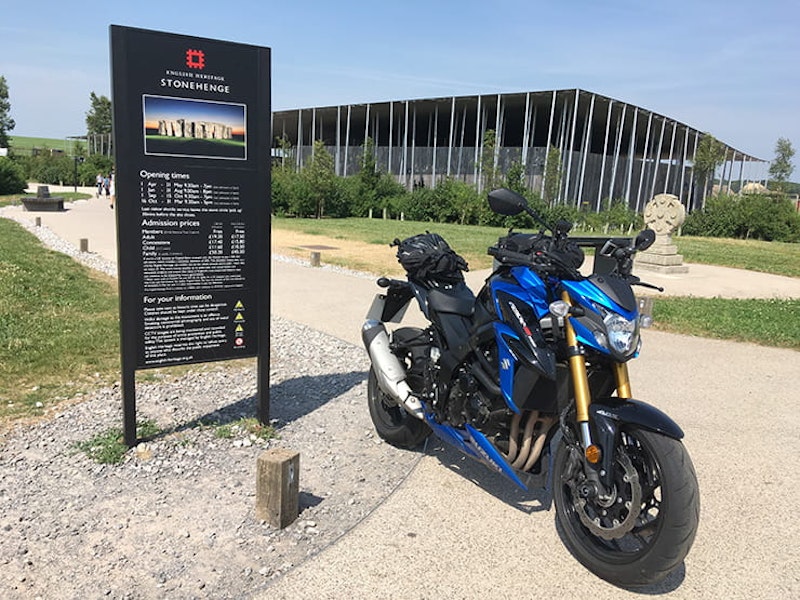
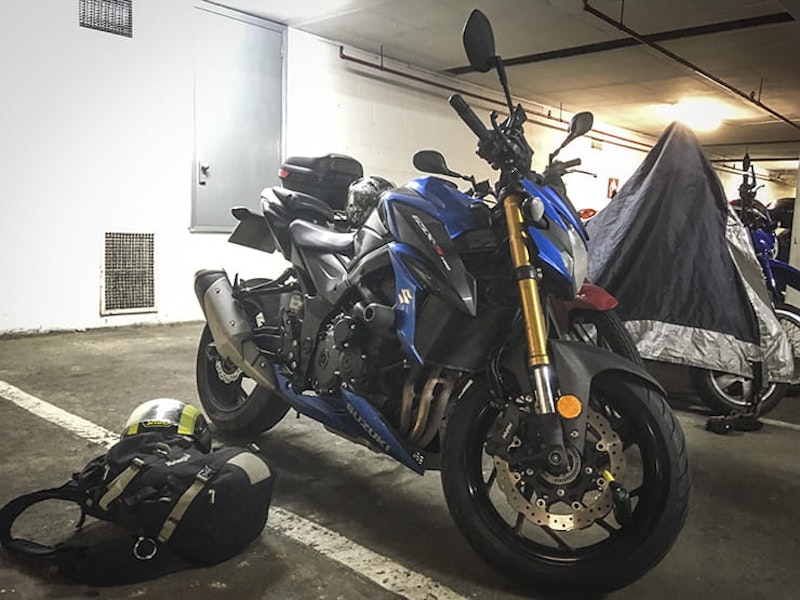
I’ve got a sensitive bum. On bike launches, I seem to be the first one moaning about achy cheeks, and my general commute, along with some two-hour rides, made me wonder how much I’d really enjoy a few hours in the Suzuki GSX-S750’s saddle on the longest day of the year. In fact, I even put my sheepskin cover on the seat the night before. I took it off: it looked ridiculous.
As I write this, I’m sat in a Premier Inn, eight hours after leaving home. I stopped to take a few pictures, to fill up once (after 138miles, with the surprisingly accurate range display on the dash saying I had 26 miles left), for lunch, and to buy a fridge magnet for my daughter at Stonehenge. And I don’t ache. I reckon I was riding for six and a half hours, though granted, I only covered 221.5miles. That’s a paltry average speed of just 34mph. I usually reckon on averaging 60mph.

I set the TomTom to plot a winding and hilly route, turning a 175mile, three-hour journey into 220miles and six and a half hours.
With two business meetings on the south coast, both booked for the day after the summer solstice, I figured I’d use the longest day to really get to know my long-term-test Suzuki GSX-S750. The boss, Steve, said that we should both do some kind of big ride – he’d go north, while I head down. The conversation started with “You go via Stonehenge. I’ll get up at dawn and see how far I can get. I should do 1000miles.” Good luck to you Steve, I thought; I hate early starts, and I’ve never been bothered about setting records when it comes to distance. Don’t get me wrong – I love riding a long way, just in my own time. The greatest distance I’ve covered in a day is only Inverness to Peterborough, via some scenic stops and fun back roads. That was just over 500 miles, and I would have stopped off, but I wanted to get back home to see my family. The longest ride I’ve had is Peterborough to Spain, but I took my time then, stopping twice in France as I navigated all the back roads – no motorways thank you.
I like to enjoy the scenery; to explore the surroundings. I like to be able to stop, turn around, and go back for that stunning view or interesting sign. I string these points of interest together with as many fast, sweeping roads as I can, but I’d rather be going as fast as I can on a ‘B’ road, than on the major routes that let you get that average of 60mph-plus.


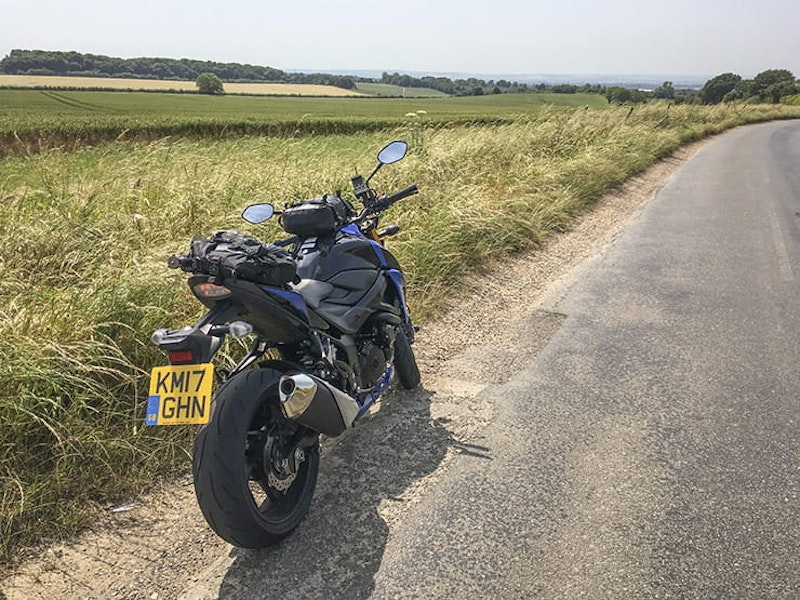
Spotted on the way to Bedford…
And I like to be on my own, not having to ask anyone else if they mind if I turn back for a photo, or stop for a drink, or nip off for a wee. I can stop to stretch my legs whenever I want, but I didn’t need to on the GSX-S. I’m not suffering now, and besides needing to stand up on the pegs a handful of times to give my posterior a bit of a break, I just kept going. My wrists certainly didn’t ache, though my neck did over the last half an hour. But that’s more to do with the camera, waterproofs (can’t be too careful, even when the Met Office says it’s going to be 30°C), computer, chargers and more in my rucksack.
While it’s far comfier than I thought it’d be, the seat isn’t perfect. When tucking down low on the bike, and shuffling my weight back as far as I can, the rear of the pad has a slight lip, which is a little uncomfortable. I like to get the back of my bum against the pillion hump, but I can’t quite do it on the 750, my bottom feeling like it’s dropping off the back of the seat. Still, slight niggles aside, I’m really impressed with how the Suzuki feels after a full day’s riding.

Suzuki GSX-S750 Luggage Capacity
I tend to over-pack, but for this journey I only needed some evening clothes and a change for the next day. But by the time I’d factored in a decent-sized security chain, some bottles of water, and all my work kit, I needed more than my Kriega R30 rucksack. Grabbing some panniers, I soon realised it wasn’t going to be so easy – the aggressively-styled tail unit, and only two buggy points behind the pillion pegs meant I couldn’t find a way of mounting throw-overs without the risk of them folding in under the tail and fouling the wheel. A Ventura pack would be a good solution for this bike, being a simple rack that securely carries a good-sized bag on the rear, but there’s not one available for this new machine yet. The answer was a Kriega US10 Drypack attached to the tank, and a US20 strapped to the tail. The larger pack took the chain, but had plenty of space left… I’m confident that I could pack enough on this bike in this way to go away for a week (and that decent sized under-seat space is ample for a hefty disc-lock and plenty more, just not quite enough for a meaty chain).

Suzuki GSX-S750 Performance
I’ve said it before, but the 750’s engine sounds fantastic – that note as you grab a handful and let the engine really work is everything a sports bike should sound like, even with Euro 4 shenanigans. Making a claimed 113bhp, on paper it might seem lacking these days, because of course, everyone needs 200bhp. Except me, it seems. My own KTM 1050 Adventure makes 99bhp at the rear wheel, and while that twin’s got more low-down thrust than the Suzuki, this four-cylinder motor fuels extremely cleanly, pulling strong from very low in the revs. No flats-spots, no woolly bottom-end, just linear power all the way.
While the ‘Easy Start’ feature may seem a novelty – touch the button and the engine will turn over until it fires – I have found myself missing it when I ride other bikes. It’s not that my life is so hectic that I can’t spare the extra 750 milliseconds of holding the button down, but it is satisfying to tap it then forget about it. The ‘Low RPM Assist’ function is here too, designed to prevent the bike stalling at low revs. You can sense it at the traffic lights: if you relax the cable-operated clutch a little, the revs build ever-so-slightly. I still stalled the bike pulling away from my lunch stop though.
After about five hours, I was a little more aware of holding the non-span-adjustable clutch lever back – it’s not heavy, but it’s not slip-assist, hydraulic light. On the other side of the bars, the front brake lever gives no cause for comment in that I’ve never felt panicked, even barrelling too fast into a few corners, but I’ve also not felt the need to get overly excited about the stoppers. They’re more than powerful enough, but not sharp. Combined with the budget clutch lever, the old-school rubber brake lines just seem a little low-rent. But I forgive them every time I hear that traditional GSX-R sound…
Being relatively low (with an 820mm seat), and weighing 213kg, at 5’10” I find it very easy to move the bike about. That’s great when I see something I want to go back for, and it’s also proved extremely useful manoeuvring through city traffic; you don’t need much of a gap to slot the Suzuki through.
My daily commute had made me question the suspension, but today’s trip left me much more complimentary. It might be adjustable for preload only, but the front always feels settled and direct, while the rear is great 90% of the time. The other 10%, it can get choppy over continuously bumpy ground. Of course, I’m used to the plush long travel of my adventure bike, but some adjustment here might have been handy, and at 13 stone, I’m not pushing the springs all that hard. Let’s see what tomorrow brings...

Suzuki GSX-S750 – The day after the day before
Meetings over, it was half five and I wanted to get home, so it was to be ‘fastest route’ on the sat-nav. With 140miles to go, I was looking for that 60mph average… rush hour M25 traffic put paid to that, so filtering knocked it down to an average of 54mph.
A total of 191 miles on day two were covered much more quickly, but I wasn’t quite as comfortable as I was on the ride down; sitting in the same position on the major roads put a little more pressure on my delicate behind, and sustained high speed started to cause my neck to ache a bit.
But that was all to be expected of a naked street bike, and ultimately the Suzuki GSX-S750 was a joy on every road. I might not have covered the 1000 miles Steve was aiming for (though it turns out, nor did he), but my route took in a real mix of fast sweeping roads, city centres, single-lane tracks and motorway. My overall average economy over 412.5miles was 48.3mpg (the second day gave me the best of course, at 51.7mpg).
I didn't focus on speed to cover the distance, but riding on the year’s longest day gave me the chance to really appreciate everything the Suzuki can do; it might not be the all-rounder that my KTM is, but it's the first machine in two years to really make me smile as much…


Part 4 - Accessories
Updated 31st October 2017. Author - John Milbank
You know a bike’s good if you miss it when you’re not on it. If I’m testing something else, or even riding my own KTM 1050 Adventure, I too often end up thinking ‘the Suzuki would be easier to get through here,’ or ‘I’d be happier on the lighter GSX-S today,’ or even ‘I want that buzz I get from the four-cylinder 750.’
It’s not perfect of course – what I’ve never thought is ‘if only I had the luggage capacity of my long-term test bike.’
Suzuki’s own aftermarket accessories list has fallen a little short for this machine since the launch, but it is growing; there’s now a stylish rider’s seat for £90, colour-matched cover to replace the pillion seat, graphics kit, tank pads and frame stickers. There’s also an increasing number of other companies starting to offer parts for it, which is no surprise, given that the Suzuki so easily invokes thoughts of the street fighters of the past few years. It’s the stripped-down 2005 GSX-R750 so many people tried to make a decade ago.
Cosmetics
I reckon the GSX-S750 is a sharp-looking bike as it is, but most of us like to add a bit of a personal touch to their motorcycles. How much you want to spend doing it is entirely up to you, but if you’re after some very high quality carbon-fibre accessories, Suzuki’s own parts are a wonderful – if pricey – option.


The carbon-fibre mudguard is beautifully finished…
All in a matt finish, with a superb quality weave and very tough construction, I’ve installed the £300 front mudguard, £145 clutch cover, £120 alternator cover and £95 starter cover. They’re all cosmetic really, besides the alternator cover, which does completely shroud the metal, offering some degree of protection in the event of a slide. Suzuki doesn’t, at the time of writing, offer any crash bungs, but both Evotech Performance and R&G Racing have this well covered.


Black silicon is supplied to secure the covers to your engine
At a total of £660, they’re a hefty investment – 8.6% of the price of the bike – but if you’re buying the machine new, and fancy the styling, it’d be worth having a chat with your dealer to see if there’s anything they can do.


With the engine cleaned, the parts are stuck on before being held in place to set
The covers are easy to fit – each part comes with a tube of black silicone that glues them to the metal (one tube is easily enough to do all three parts). I first cleaned the engine cases, then dotted the silicone as it showed in the instructions. You’re told to tape the parts in place for 24 hours before riding the bike, but this is surprisingly hard to do without using the frame, which tends to see the tape try to lift the carbon away – make sure you only tape it to the engine. Insulation tape works well as you can stretch it.


The mudguard takes a bit more work to fit… a screwdriver will help you gently prize the brake lines out of the clips
The mudguard was a little more time-consuming as you need to take the calipers and wheels off, as well as gently prying the brake lines out of their clips. I just wish Suzuki had included some bolts that’d allow you to remove the large side reflectors…
Of course, there’s no real ‘need’ to fit these parts – the carbon-fibre is adding weight, not reducing it – you do it simply because you want something a little more unique. I’d like to see more carbon options, in the same matt finish, but another route could be to use a 3D matt carbon-effect wrap… I’m wondering if the blue panels would look good with this on. Let me know what you reckon in the comments below – should I go for a stealth look?


Practicality
If I need to carry a lot, I’ve always gone back to my KTM – the hard Givi luggage I have on that is easy to clip on, and gives me well over 100 litres of storage.
I tried some throw-over panniers on the Suzuki, but sadly there are no strapping points, and the sharp design of the tail seemed to make it impossible to prevent the bags from folding underneath and potentially fouling the wheel when the suspension’s compressed. I needed something more solid…


Suzuki’s tank bag needs drilling to fit the adaptor ring that clips on the bike
Suzuki offers two tank bags – the £150 large one has up to 15 litres’ capacity (11 litres unexpanded), while the small goes from five litres to nine litres, and costs £95. That’s the one I have, but to fit either, you also need the £32 tank bag ring, which bolts over the top of the filler cap.
Fitting is clearly aimed at your dealer – it’s no major hassle, but you have to drill the bottom of your tank bag to fit the mounting kit that attaches to the ring on your filler cap. The instructions aren’t that clear, seeming to guide you through drilling holes for it set forward or back, with no advice on which you should use; it tells you to pay attention to the drill template shown in ‘drawing 1’, but there are two drawing 1s! I went with it set back, to make sure I could reach the keys, though while the plastic template supplied is very useful, it says to use an 8.5mm drill. Yet only an 8mm will fit through the guide holes. Take your time and it’s reasonably self-explanatory… or just leave it to your dealer.
The bag’s compact and fits very securely to the tank ring, pulling off quickly with a useful strap at the front. A zip, who’s toggle is usefully tucked under an elastic strap, can be run around the base, which allows the bag to expand from five litres to nine – it’s just enough to get a pair of jeans, pants, socks, light shoes and a tee-shirt in.


The bag will swallow a fair amount, while the adaptor ring is unobtrusive on your tank
There’s a cable port at the front and rear (you need to cut the fabric underneath to open them up), with one elastic mesh and one zipped mesh pocket inside. There’s also a rain cover supplied, which has a draw-string to keep it in place, while the top is clear and touch-screen compatible. I’m not sure how useful this is though, as there’s nothing to keep your phone in place on top of the bag. You could shove a map under there…
The tank bag is great for a day, or overnight perhaps, but I needed more. A Ventura Evo bag and luggage rack fixed this, giving me a healthy 40 litres of space at the back. It costs about £320 all in, but really does make the Suzuki far more versatile – read the full review here.
Without the bag, the rack isn’t too intrusive, but whether you feel it spoils the lines too much will be a decision only you can make. Suzuki’s carbon-fibre parts give some real style, and if you’re not planning to spend a lot of time in the saddle, one of the tank bags will see you right. But as the GSX-S gains the hearts of more riders, it’s great to see options like the Ventura bag becoming available if you want to do more with your motorcycle.
I’ll shortly be fitting some crash protection and a tail tidy to the GSX-S750… keep an eye out for future updates…

Part 5 - Evotech Performance Review
Updated 28th November 2017. Author - John Milbank

We all hope we never use it of course, but crash protection on a motorcycle can potentially save you a fortune in damaged panels and fork bottoms; when buying a bike, always check the lower ends of the fork legs – they’re easily scuffed in a drop but very expensive to replace (also look out for someone chamfering the opposite leg to match the damaged one!). The same goes for the swingarm, not to mention of course the engine cases; if you chuck your bike down the road with any speed, there’s a real chance of these getting holed. Then the oil’s gone and your engine seizes, or fills up with gravel.
So crash protection is a worthwhile investment, and though some people still talk of the idea of your bike potentially receiving more damage due to the stresses put on fixing points during a crash, I believe the benefits outweigh the risks. The leading crash protection manufacturers design their kit carefully, and while it’s impossible to know what each crash could involve, it’s a reasonable assumption that in most spills, some quality protection could save you a lot of money.
If your bike slides into a brick wall at 60mph, there’s little that’ll save it. Equally, if your machine does bounce along a curb, tearing your crash bobbin out of its mounting, that same, unprotected crash would likely have had a serious impact on your alternator or clutch cover anyway.
I’ve always fitted crash bungs, and as my long-term test Suzuki GSX-S750 is being used on road and track, as well as through the coming winter, I want to make sure it looks as good when I give it back as it did when received it.
In the last instalment I bolted on several of Suzuki’s own carbon-fibre and luggage accessories – read about them here – but this time I’m looking at accessories from Evotech Performance. Making almost all of its accessories in its Lincolnshire factory, the company came to life after one of the directors – designer and engineer Chris Vines – created a tail tidy for his own bike while he and Dan Rack were making parts for worldwide industry at their company, Drury Precision, which shares much of the tooling now used to manufacture bike parts.


Crash bungs | £67.99
These are extremely easy to fit – use a hex key to remove the two original bolts, and the same one to fit the new bolts, which carry these two-part crash protectors. They’re very well made, with a tough plastic main section and aluminium inserts. Evotech Performance does all its own powder-coating in house, so the black spacers used with these sliders are the same finish as all the other parts to come out of the Alford workshop.
The sliders are mounted well forward on the bike, so there’s no chance of them fouling your legs or knees, and I was impressed that the instructions, which are only available online, include the torque setting – 70Nm. This is important on engine mounts, and I’d suggest that if you don’t have a torque-wrench, you borrow/hire one, or ask your dealer to fit these.


Front and rear axle bobbins | £32.99 per set
Again, these are very quick and easy to install – you just need to make sure you have two 13mm sockets to tighten the nyloc nuts at either end of the threaded rods, which pass through the front and rear axles.
Tough plastic sliders sit on machined aluminium bases, and while the rear axle’s rod could be a little shorter, it sits flush with the end of the slider, not poking out past it.


Radiator guard | £54.98
Beautifully made, and finished with Evotech Performance’s trademark matt-black powder coating, this rad guard is laser cut from aluminium and fits perfectly.
To install, you only need to take the clip and screw from the inside of the two front inner faring panels to have enough flex to slide the guard up and bolt it into place – I was relieved to not have to strip the Suzuki’s panels off as they have a lot of small, brittle clips inside.
Six little rubber plugs keep the guard tight, which covers the entire radiator. The distinctive hexagonal holes are reminiscent of the bespoke Evotech Performance guards used by some BSB and IoM TT race teams


Tail tidy | £120
Of course, this doesn’t offer any protection, but eliminating the original number plate and indicator hanger makes a huge difference to the look of the GSX-S. Homologation rules state that all motorcycles must have their number plate behind the rear wheel, which is why you’ll often see those plastic monstrosities dangling behind an elegant tail section. Fortunately, most manufacturers make it very easy to take them off, though bear in mind that if we end up with an MoT ruling system like that of Spain (don’t for a minute think that Brexit will make us immune to European standards), it’ll be just as important that you can easily put the bike back to original.

Evotech-Performance develops kit by scanning the bike in 3D then modelling the parts digitally
I’m particularly impressed with the fact that there’s a loom adaptor included with this kit, so there’s no need to cut your original wiring for the new LED number plate light. Evotech Performance has limited its overall range by insisting that you don’t need to modify your bike to use its kit, but it can make life easier if your machine’s in the range.
While all parts have a QR code to scan, which gives you access to an online PDF instruction manual, it was when fitting this tail tidy that I really missed a paper-based guide – I just think it makes life that little bit easier, and personally I’d be willing to pay an extra couple of quid to have one.
Despite using my phone to read the instructions while fitting in my garage, it was still a relatively simple job, and the finish is wonderful. The unit is machined from aluminium, with perfect recesses for the OE indicators, and even neat little channels for the zip ties that hold the wiring in place.
The whole tidy fits perfectly into the GSX-S750’s tail, and has a very neat plastic cover that finishes it off a treat, even though you have to get on your knees to see it; a very nice detail. It’s worth noting that if you don’t fit the cover, you should still be able to use a Ventura luggage rack, as the fixing points are still there.


The plastic cover hides the fixings for a factory finish
There are also two adaptor plates that let you use your number plate without re-drilling it by creating adjustable mounting holes. The only problem with going down this route is that there’s a little more flex in the plate, and the lamp doesn’t illuminate it as effectively, due to it being pushed out by about 5mm.
It’s a shame that, like other tail tidies, you can see the ends of the indicator fixing bolts if you stand at the right angle, but this Suzuki’s are far more subtle than many others. I might consider some heat-shrink tubing over them, to disguise that shiny silver thread and nut.


The crash protection is, I think, a valuable addition to this and any bike. Like the well-crafted tail tidy, it’s also a great way to add your own touch to a standard motorcycle. I don’t think any of the parts look out of place, and as the finish matches across them all, they tie together nicely. The total value of the accessories is £308.95, but for the standard of finish it’s well worth it, and the bike looks even better…
Part 6 - Fireblade Beater
Updated 18th January 2018. Author - John Milbank
“It’s got some go that, hasn’t it?” When it’s BikeSocial’s Michael Mann saying it – someone far from sluggish – and he’s riding a 2017 Honda Fireblade, you know the Suzuki GSX-S750’s ‘paltry’ 113bhp really is more than adequate.
We’d just been thrashing home from a meeting, taking the back roads. I knew the way, so was just in front. We turned left, both gunned it, and the 189bhp Honda didn’t come past. Well, not until speeds that saw me seriously considering my licence and backing off. Of course the ’Blade is more powerful than the Suzuki. It’s faster too. But only when you start getting to really silly speeds.
It’s been my gripe with big sportsbikes for years – they’re just not that much fun until they’re cracking 100mph+, and on the road, that’s soon going to end in tears. The Suzuki has a free-revving motor that sounds like the GSX-Rs of old, and wills you to wring its neck. It’s quick, but it’s not stupid-quick.
That performance is also making more sense as winter takes hold. While Michael’s Fireblade got relegated to the garage, the GSX-S isn’t worrying me on the increasingly greasy roads. Unlike far too many Euro 4 bikes, there’s no lag to the fuel injection, and no sharp uptake. It’s progressive, it’ll fire past traffic as quick as you like, but it doesn’t feel like I’m riding a knife-edge of grip.

The Pirelli Rosso IIIs are wearing well and work fine in the winter
The Evotech crash protection (See above) gives me a bit more confidence on the more dodgy surfaces, but I’m not lulled into any false sense of security. The Bridgestone S21s that came with the bike gave me no issues, but they were close to their wear indicators at 3685miles. Now, with nearly 6000 miles showing on the dash, the Pirelli Rosso IIIs I replaced the OE rubber with have proven utterly dependable. Their first outing was on track, where they gave more grip than I knew what to do with, and haven’t given me any hairy moments, even on the cold, wet January roads. I’m not riding anywhere near the speeds I was in the summer, but I’m still getting far more use out this bike than I would on something more aggressive.

On track, the Suzuki is a great bike, with more than enough performance for most normal riders.
Okay, the fact that it’s not fully-faired means it’s more open to the elements, but I’ve given the Suzuki a good coating of XCP Corrosion Protectant, and try to keep it as clean as I can. My next update will look closely at how the machine has faired through the salt, but the signs are encouraging.
I could go winter-mad and fit some heated grips, but my Keis heated jacket is there when things get too cold for the Rukka. I have started to wish I’d put them on though – 150 miles in January really numbs the fingers…

The tail tidy looks so much better than the original, but I am noticing a bit more spray on my rucksack and the pillion seat in this bad weather. When installing the tidy I didn’t refit the Ventura luggage, simply because I haven’t had any big trips since then that needed the space over my rucksack and the Suzuki tank bag – it’ll be going back on soon.


Evotech crash protection on the front and rear axles – as well as main crash bungs – looks good and adds confidence
GSX and the city
Being low and not too heavy, the Suzuki is easy to weave through city traffic – on two recent winter rides down to New Scotland Yard, I was glad to be on this, and not my more unwieldy KTM 1050 Adventure.
But it’s not all rosy – compared to the Austrian machine’s hydraulically-actuated slip-assist clutch, the cable-operated unit on the GSX-S750 is heavy and unrefined. To be fair, it’s only noticeable when you’re spending an hour picking your way through traffic, but when you’re used to the luxury of a lightweight slipper unit, you’re aware of this aged design.
You can feel some vibes through the heel guards, but they’re not distracting, and I can forgive anything that sounds this good.
I’ve said before that the one-touch start is quite satisfying – quickly flick the button and the bike turns over and fires without you needing to hold it. Okay, that saved fraction of a second might seem irrelevant, and on the spec sheet, you wonder who’d care, but use it and you’ll miss it when on another bike.
Also of dubious value on paper is the ‘anti-stall’ feature, which promises to increase revs and prevent stalling when pulling away. Think about it though, and its appeal in city riding becomes obvious.
Sadly, it doesn’t seem to work. Now, I know how to pull away, but we’ve all had that moment when, with cold hands on a wet road, you don’t give it quite enough, and you’re left with the cars on either side of you closing up that gap you were aiming for on the roundabout. The fact that I expected the Suzuki to help me out made the two times it happened all the more frustrating. Still, once fired up again, and as I scream past the cars that tried to take pole position, I once again forgive the GSX-S because it sounds so damned good.

The genuine Suzuki carbon-fibre parts aren’t cheap, but they look great
I know that this loan bike will have to go back to Suzuki soon, but I’ve really grown very, very attached to it. As an all-rounder for my needs, the only thing its lacking is large hard-luggage capacity and plenty of space for a pillion – something an adventure bike does so well. I also find that the rear is a bit choppy over poor tarmac on fast back roads, but it’s a niggle that raises its head infrequently.
If you’re happy with soft luggage, the Ventura kit works a treat. If you’re riding mainly without a partner, there’s nothing to complain about. If you want to modify it, the Evotech tail tidy and stunning Suzuki carbon-fibre parts are a great place to start. And among today’s prices, it’s not too eye-watering. In fact, you can pick up a pre-registered one for just £6,995…
Part 7 - Winter of Content
Updated 14th March 2018. Author - John Milbank
Mileage: 5560 | Economy: 42.7mpg | Power: 113bhp | Torque: 69lb-ft | Weight: 213kg | Price: £7,699
I admit it: when the snow hit this year, I worked from home. While some of the main roads were fine, the streets getting away from our house were so thick with snow and ice that, despite the Evotech Performance crash protection, I didn’t want to chance sliding off.
But otherwise, come sleet, rain or hail, I’ve continued riding this great little street bike. I own a KTM 1050 Adventure, yet prefer the GSX-S in these clumsy conditions – it’s lighter, I can more easily get my feet down, and despite the lack of weather protection, it seems to be dealing well with the road salt that’s caked over it.


The luxurious carbon-fibre extras will shrug this grime off at the next wash
It helps that I’m what could best be described as a little OCD about cleaning it. I don’t wash it every day, or even every week, but when I do, I do it properly: I cover it in snow foam, then I jet wash it (carefully), then I clean it with Surfex HD and a long-reach paintbrush, then I rinse it, then I towel it off, then I blow dry it with a Brühl dryer, then I towel it off again.
If you’re following my test of corrosion protectants – which is still ongoing after more than four months because two of the products haven’t allowed corrosion through – then beware, spoiler alert: I spray my bikes all over (except the brakes and tyres of course) with XCP’s Rust Blocker. While the poor little Suzuki is covered with grime as I write this, it was in a worse state last time I washed it, but still looked pretty much like new once I’d finished.
Except the chain – that seems to corrode more easily than others, like the one on my KTM. I recently explained in a video how to clean the chain, after seeing how grotty the GSX-S750’s drive had got. Even after that though, and a good coat of quality chain lube, the surface rust still came back. Fortunately it’s still moving fine, so it’s only cosmetic… perhaps it’s the small price to pay for such a relatively good value bike with such a great engine.
How to clean your chain

Should you use WD-40? What about petrol or kerosene? Consumer editor John Milbank explains… Should you use WD-40? What about petrol or kerosene? Consumer editor John Milbank explains…
Yes, I love this engine. In the winter, the 113bhp is delivered smoothly and progressively. On dry roads, the induction howl is intoxicating. And on track, it’s got more than enough for me; I’m no race hero – I’m happy going at my own fastest pace, more focussed on the sound and feeling of dragging my knee than beating my own, or anyone else’s lap times.

I’ve been making a lot more use of the Suzuki tank bag recently; from carrying toy train parts for my mate’s little boy, to tools for setting up our office video studio. It’s small, but surprisingly practical.
It’s not cheap though – at £95 for the bag and another £32 for the tank adaptor, there are less pricey options. Still, it is well made, and when I had my DSLR, macro lens and flashgun in there, I found it was (fortunately) rain-proof enough without the cover (which I’d left at home) to protect my kit through 10 miles of rain. There’s also a good chance you could get a deal on one if you sweet-talk your Suzuki dealer when buying a bike.
I’ve been very lucky to have kept this bike over winter; most manufacturers ask for their long-term loan machines back around October, but we’ve had this almost a year now. Maybe if I keep quiet they’ll let me keep it a bit longer… the GSX-S750 is so good I don’t want to lose it.
Likes & Dislikes
Easy to stand over
Smooth power delivery
Intoxicating induction roar
Wish I’d fitted heated grips
The chain rusts easily
I miss the luggage capacity of my KTM 1050 adventure
Part 8 - 12 Month Review
Updated 19th April 2018. Author - John Milbank

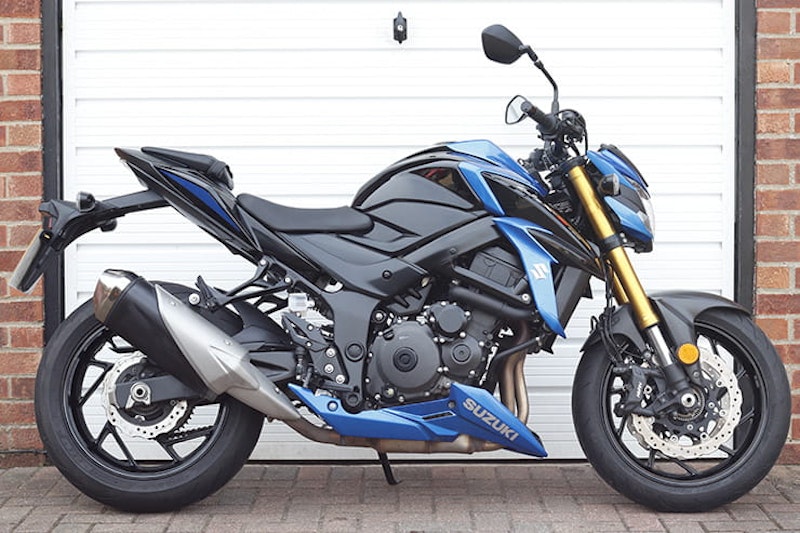
After just over 5500miles, with its accessories removed and cleaned for the last time, it’s a great chance to see how well the Suzuki has fared…
Mileage: 5560 | Economy: 43.5mpg | Power: 113bhp | Torque: 69lb-ft | Weight: 213kg | Price: £7,699
It’s all very well riding a new bike around the sunny roads of Spain and beyond on a press launch, but only by living with a motorcycle can you find out how well it really fares on British roads, and through the British weather…


Ventura luggage made the Suzuki a lot more practical
Commuting
BikeSocial had the Suzuki GSX-S750 on loan from March 2017 to April 2018, and during my time with it, I was riding it to and from the office almost every day. The low seat and reasonable weight made it an easy machine to move around, and not being too wide, it was easy to filter through traffic. The glitch-free fuelling also made it a joy in any traffic… if only the cable-operated clutch had been a little lighter. Having grown used to the slip-assist units of many new machines, the Suzuki’s feels stiff, leading to slightly tired fingers in really heavy city traffic.
Fuel consumption was typically around 45mpg, so given the 16litre tank, fill-ups were necessary every 135miles or so, to not be worrying about riding on fumes (the maximum range would be 157miles). I have seen 52mpg, which would give a range to dry of 182miles. There’s an accurate fuel gauge, but I’d have liked it to be backed up by a bright warning light too. Still, I never actually ran out of gas.
I used a Ventura luggage rack and pack on the bike, which gave me plenty of space for all my work kit. I’m a fan of lockable hard luggage, but the idea of putting a top box on the naked Suzuki just didn’t seem right.


There’s a good amount of space under the pillion seat, but the battery needs an Allen key to get at
There’s a reasonable amount of space under the seat – enough to just jiggle a 10mm chain and an Abus U-type disc lock in. Impressive.
The headlight’s okay, but tip into a bend in the dark and the sharp edge of the beam means you tend to lose some of your view. Sadly this isn’t unusual on many bikes, but a set of Denali auxiliary lamps wouldn’t look as natural on here as they do on a tourer or adventurer.
Traction control is fitted to the bike, and I do appreciate the safety net, though it was only on the iciest days I noticed it cut in.
Over winter, I did suffer a flat battery, though this was due to the BikeTrac tracker being activated repeatedly by movement, so drawing power from the bike without it being run while I was away on press launches for two weeks. To get to the battery, you need to remove a bolt on either side of the fairing, pop these panels off, then take out two bolts to get the seat out. I’d recommend fitting a fly-lead to you can easily plug a charger in.


Before fitting the Ventura luggage and Suzuki tank bag, a couple of days away was covered by strapping Kriega luggage to the bike
Long distance
Whenever and wherever I have a meeting or event to attend, I go by bike as much as possible. The Suzuki’s wind protection is fine for a naked machine, and the riding position not too extreme; just as I like it.
The seat’s not bad. I tend to get an achy bum quicker than other people, but my biggest issue here was that the sharp front edges dug into my legs a little over long journeys, while the rear pressed into my bum when I slid right back. Still, it’s far from the least comfortable bike I’ve ridden, and some of those were actually meant to be tourers.
For more luggage capacity, the sharply designed tail unit was a little restrictive – I couldn’t securely get soft panniers on, so strapped everything onto the rear seat. The Ventura pack can carry a lot, and leaves the pillion seat open for a roll bag, but if taking a pillion you might struggle with enough kit for more than a weekend.
I fitted the Suzuki tank bag, which while small added a useful amount of extra space. At £95 plus £32 for the fitting kit, it’s not cheap, but it’s well made, and if you buy a new GSX-S750, you might be able to barter a good price with your dealer. A larger model is also available.
At about 85mph+ in sixth gear on a steady throttle, the engine makes a slightly odd ‘wow…wow…wow…wow…’ sound. It bugged me at first, but it’s only through re-reading my notes that I remember now; clearly I got used to it!

Riding for pleasure
The GSX-S750 motor is sublime, and not just thanks to that brilliant fuelling (many manufacturers could learn a thing or two from Suzuki’s perfect fuel injection); it sounds awesome. I never bothered with a loud end-can as the induction howl was so brilliantly reminiscent of the GSX-Rs of the early 2000s.
Hacking around my favourite back-roads, the bike’s easy to throw around, but the rear shock did feel a little harsh sometimes – some pot holes and other imperfections could be quite jarring. A high-performance shock from the likes of K-Tech or Maxton would be money well spent if you regularly push hard, but I never felt the bike was truly bad.
On track, I loved it. I’m not the fastest rider, but there was more than enough go – and stop – to make this a brilliantly enjoyable bike. The brakes are good, giving plenty of progressive bite, though towards the end of the loan they didn’t feel quite so sharp. A set of new, sintered pads would likely have helped, or perhaps fitting some braided brake lines, though of course the ABS pumps on all modern machines over 125cc means this is slightly more involved than it used to be.
The bike comes with Bridgestone Battlax S21s as standard, which proved great on road and track. At 3685 miles, they’d squared off (I could have pushed them another 500-1000 miles), so switched to Pirelli Rosso IIIs, which were equally good in the wet and dry.


Inside the swingarm was an area I’d know now to spray with protectant
Keeping it clean
Whenever I get a bike, I spray it over with XCP Rust Blocker, but the general finish of the Suzuki GSX-S750 is very good – particularly the engine, which still looked great after 5500miles in all weathers.
I’m fastidious with my cleaning, but I don’t do it that often; really we should at least rinse our bikes off after every ride, but that’s just not always practical when you get home from work late on a cold winter’s evening. This bike had a relatively tough life, so some parts did suffer…
Chain: Despite cleaning it thoroughly and keeping it lubed, the side plates of the original chain kept rusting. The inner section though was fine, with only the odd spot of very light surface corrosion. The hex-head bolts make adjusting the chain relatively easy, though with no centre stand, you will need a paddock stand.
Banjo bolts and fasteners: These tended to fur up a bit. Knowing how they’ve gone, if I had the bike again I’d recommend wiping over all of them using a rag soaked in XCP.
Radiator: The paint at the top of the radiator, where the hanger folds up, had flaked at one spot – there was no corrosion, so I think this was quite recent, perhaps as a result of removing the rad guard.
Swingarm: This was the spot that, while far from bad, concerned me the most – if not noticed, over several years it could become an issue. The pressed-steel unit had several spots of rust breaking though the black paint on the inside of the swingarm, hidden by the wheel. I’d never got any XCP in here, so now knowing this vulnerability, I’d strongly recommend soaking one face of a rag and wiping it in here, avoiding getting it on your wheel. Better still, drop the wheel out and give it a coat.
Shock: The main shock body was fine, but the preload adjuster was fairly furry looking after a year. It’s purely cosmetic.
Gear selector: After cleaning, the thin matt paint on here hadn’t held up great, leaving a small area that spoiled the overall look.


The engine and frame showed no signs of any corrosion after a harsh year’s riding
The exhaust downpipes were of course tarnished after being blasted with everything the UK’s councils spread on our roads, but they looked fine. Equally, the front of the engine fared well, with no peeling paint or corroded areas.
While the swingarm is worth a little extra attention to keep it tidy, the rest of the frame looked as good as new after a clean, including under the panels.
Cleaning the bike is not really harder than any other (I carefully use a jetwash, snowfoam and Surfex HD cleaner with a long-reach paint brush), but the wheels, with their matt finish on all but the outer edges of the rims, are a pain; when dry they look tatty as fine dirt and salt is held there… give them a good wipe off with a microfibre towel and a little XCP.


Wear and tear
Testing products being the main part of my job, I tend to strip my bikes down a fair bit, to install heated kit, sat-navs and the like. The Suzuki’s plastic panels look and feel great, but the small clips on the back are pretty poor, snapping easily. The bike goes back together well, but you need to keep be careful.
The heel plates are painted metal and scuff easily – they’ve not corroded, but they do look a little tatty after a year. I also noticed a small split on the edge of the pillion seat, through it’s only really visible with it removed, or when you’re kneeling down.


Accessories
While the main pic at the start of this article showed the bike as it is now that I’ve stripped most things off, the carbon Suzuki accessories remain (the engine covers are stuck on). Expensive, yes, but this kit was exquisite; again, it might be worth bartering with your dealer if you fancy the beautiful front mudguard and case protectors.
As you can see from the first shot directly above, I also fitted a £120 Evotech Performance tail tidy – made of billet aluminium it looked superb on the bike, and really tidied up the back-end. This did of course let more rain spray hit my backpack when riding, but it was worth it.
The £54.98 Evotech Performance rad guard and variously priced crash protection all added to the machine, and were easy to fit and remove.
Second opinion
My brother-in-law, a riding instructor and passionate biker, had a go on the GSX-S; “I really like it,” he told me. “I love the riding position, which is much better than the Z800 I tried, and I prefer the looks of this to the Triumph Street Triple and the Yamaha MT-09.
“It sounds fantastic, but there are little bits I don’t like, like the sharp-edged exhaust heat shield. It doesn’t sound like it needs a new end-can, but it certainly looks like it.”
BikeSocial’s Michael Mann, a sportsbike rider through and through, was impressed with the drive from this relatively low-powered machine (compared to the Honda Fireblade he had); “Bloody hell, that’s got some go” he once told me after a particularly spirited ride together…
2017 Suzuki GSX-S750 final verdict
Despite some niggles with the construction and finish, I’ve been thoroughly impressed with the Suzuki. I wouldn’t hesitate to recommend one, but I would suggest you pay a little bit of extra attention to the areas I’ve highlighted.
Overall, the awesome-sounding engine, easy handling and good price make this a great buy. 113bhp might not sound much these days, but you can really work this engine and enjoy it, rather than dancing nervously around the throttle of today’s hyperbikes.
Suzuki GSX-S750 vs Kawasaki Z900

John and Simon Hargreaves find out which is the better naked machine…
If you’d like to chat about this article or anything else biking related, join us and thousands of other riders at the Bennetts BikeSocial Facebook page.
2017 Suzuki GSX-S750 - Technical Specification
| Engine and Transmission | Liquid cooled, four-stroke, double overhead camshaft, 16 valve, in-line four cylinder |
| Capacity | 749 cc |
| Bore x Stroke | 72.0 x 46.0 mm |
| Compression Ratio | 12.3:1 |
| Maximum Power | 112.6 bhp @ 10500rpm |
| Maximum Torque | 59.74lb.ft @ 9000rpm |
| Exhaust | Four into one with catalytic converter |
| Frame | Mixed D section and round section steel tube |
| Wheels/Tyres | Front: 120/70ZR17 (58W), 17 inch diameter ten spoke cast aluminium alloy Rear: 180/55ZR17 (73W), 17 inch diameter ten spoke cast aluminium alloy |
| Suspension | Front: Inverted telescopic fork, adjustable preload Rear: Single damper, seven position adjustable preload |
| Brakes | Front: Twin petal pattern disc, four piston radial caliper Rear: Single petal pattern disc, single piston sliding caliper |
| Wheelbase | 1455mm |
| Seat height | 820mm |
| Dimensions | Length: 2125mm (83.7in)Width:785mm (30.9in)Height: 1055mm (41.5in) |
| Weight (wet) | 213kg |
| Fuel Tank Capacity | 16 litres |
| Fuel Consumption | 57.6mpg |
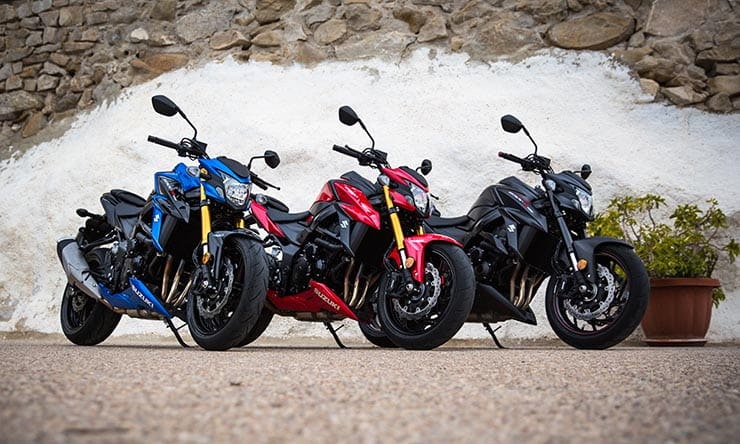
| Colours | Blue, Red, Black |
| Price | £7,699 |


