Tru-Tension Chain Monkey motorcycle chain tensioning tool review


By Stephen Lamb
Production Manager
28.07.2022


Date Reviewed: July 2022 | Tested by: Steve Lamb | Price: £24.99 | www.tru-tension.co.uk
We all know that maintaining the right tension on our bike's chain is important, but how many of us are confident that we're doing it right, or just put it off as awkward, confusing, or just too much work?
The Tru-Tension Chain Monkey chain tensioning tool is designed to take the guesswork out of this often-overlooked bit of maintenance, but does it live up to its bold promises of making the process "quick", "easy", "simple" and "with precision"?
I've been using it for the last few months on my own Ducati Scrambler Classic and Honda NC750X to see if it really can make the task easier quicker and less prone to guesswork.
Well-made and should last ages
Once set, no further adjustment needed (for the same bike)
Makes the process repeatable and consistent
Can be fiddly to set up for first use
Doesn’t make the process much quicker

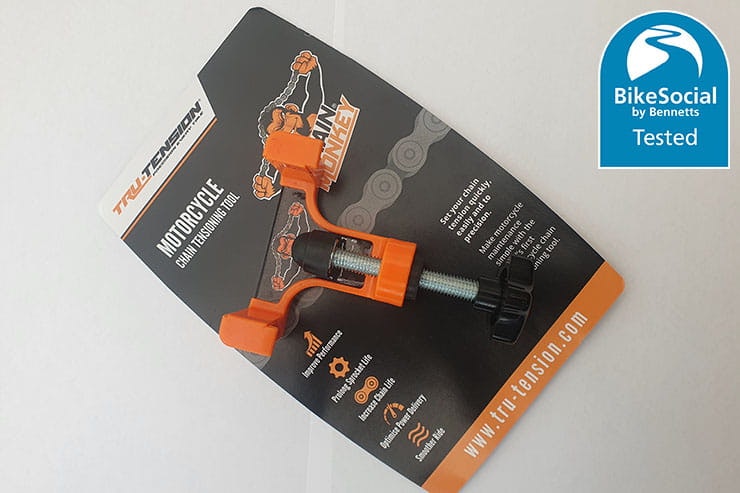
Tru-Tension Chain Tensioning tool - Construction
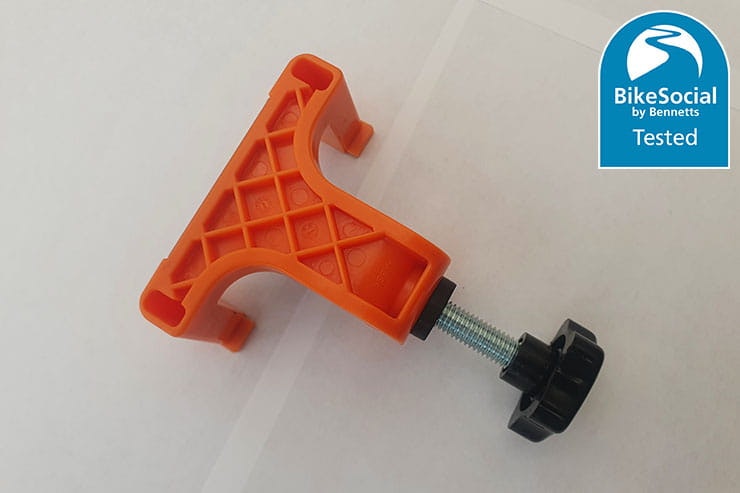
First impressions of the Tru-Tension Chain Monkey tool are favourable. The chunky orange body of the tensioner looks robust and should be well able to withstand the inevitable knocks and drops that accompany many tools.
On closer inspection the quality continues, with the body of the tensioner and the knob of the adjustment screw manufactured from injection-moulded Acrylonitrile Butadiene Styrene (or ABS as we all know it, which means that it can be recycled at end of life) with the main body moulded in a single piece, eliminating any weak joints or points of failure.
Where the adjustment screw passes through the body of the tensioner, a brass threaded insert is used, allowing the correct tension to be applied without fear of stripping threads or cracking the housing, and the M10 adjustment screw, domed nut and handle are all thread locked in place to prevent anything coming undone in use (I tried - and failed - to get them apart).
Finally, but importantly for those of us that like to keep their tools clean and tidy, the glossy surface of the Tru-Tenion Chain Monkey means that its quick and easy to wipe down after use (a quick spritz with WD-40 and it wipes clean).

Don't throw away the packaging card - you'll need to refer to it when you change bikes
Ease of Use
The Tru-Tension Chain Monkey comes with instructions for use, and to be honest, on first review, I didn't find them that clear, with phrases like 'circular stop' and 'orange base' being a bit vague. Once I'd read them through fully though it all becomes a bit clearer, and if in doubt there is a video tutorial available online, accessed via a QR code.

You don't need to be this precise when measuring your chain, but a digital caliper is a good-to-have
Don't go thinking that the Chain Monkey will take all the work out of adjusting your chain though as there's still some things you need to know before you start off. Firstly, you need to measure the size of your chain to know which setting to use for the Chain Monkey. I did this with a digital caliper (which you can get from most hardware/accessories stores, including Halfords, where BikeSocial Members get a discount), but you don't really need to be this accurate – you either need to know if your chain is 10-13mm wide (of should that be deep) or 14-17mm wide/deep. Mine was just under 13mm, so I used the setting for the 10-13mm chain (if your chain is 13.5mm, you'll need to choose for yourself).


You'll need your chain width and factory recommended slack to set the pretension in the Chain Monkey
Once you know the thickness of your chain, you need to know the manufacturer's recommended chain slack allowance – this should be in your owner's manual.
Armed with these two numbers, you can use the reference chart on the back of the cardboard insert (you didn't throw it away – did you?) to know how to pre-set the Chain Monkey. For my bike (a 2016 Ducati Scrambler Classic) I needed the bottom of the domed nut to line up with the line for setting 2.
The rubber 'circular stop' now comes into play as this needs to be pushed up against the base of the tensioner body to prevent the screw being lowered again (I found screwing the stop up on the thread easier than trying to push it up).
While this does all seem a bit of a faff, especially when the tool is supposed to make the job easier, once it's set (assuming you have just the one bike), then you won’t need to reset it again.
Once this is done, it's time to adjust the chain.


Finding my 30mm socket took longer than adjusting the chain
While I won't go into too many details about chain adjustment here as the exact process varies from bike to bike (but if you need a reminder, we have an excellent article all about chain adjustment here), once the wheel spindle nuts are slackened, the Chain Monkey is hung on the chain and the tensioning screw done up until the rubber washer seats against the base of the body.


Adjustment marks can be inaccurate, but are close enough for most bikes. 145Nm will ensure no wheel/bike separations
What the Chain Monkey is doing is effectively pretensioning the chain by a set amount, meaning that you can just use the chain adjusters to remove any remaining slack, thus removing the process of adjustment, measuring, readjustment, remeasuring.
Once the adjusters have been used to remove any slack, and the wheel spindle nuts are retightened (using the manufacturer's recommended torque setting - 145Nm in my case), the Chain Monkey can be loosened and removed.


Before adjustment - 35mm of slack. After adjustment - 25mm.
Accuracy
For the photos in this review, I used the Chain Monkey to adjust the chain on my Ducati Scrambler – MoT time is looming, and I don’t want a fail for something as simple as a loose chain.
The traditional method of checking chain tension is to measure the total movement in the chain at the midpoint between front and rear sprockets. Using a steel rule, I measured mine and found 35mm of slack. The Scrambler owner's manual recommends between 27 and 29mm.
Once tensioned using the Chain Monkey, there was 25mm of slack – a little tighter than recommended, but once everything settles down after a ride, I would expect this to be spot on.
I can't help thinking that this was more luck than judgement though, as the setting I used on the Chain Monkey (position 2) covered all chains between 10 and 13 mm, and with recommended slack of between 26 and 38mm – quite a wide range of variables, each of which could impact on the final tension of the chain.
Maybe I just struck it lucky, but I wouldn't be surprised if for some chain and slack combinations, some further adjustment would be needed.


In case you threw yours away, here's the insert card
Value for Money
At £24.99, the engineering and quality that has clearly been put into the product shows through and my first inclination is to say that the Chain Monkey does provide value for money.
In use though, I'm not quite as sure.
Most of the work around tightening your chain is still needed, with or without the Chain Monkey, so I can’t honestly say that it delivers it's advertised purpose of "set your chain tension quickly, easily and to precision".
It does give you a 'firm stop' position in the adjustment process so does provide a consistent and repeatable result and, if you have just one bike, then the initial set up only needs doing once, but for those of us with multiple bikes, setting up the Chain Monkey multiple times pretty much erodes any time savings against using a traditional steel rule and multiple adjustments.
The chunky construction of the body of the Chain Monkey means that it should last well, and therefore (as long you keep the reference chart) will be used on many future bikes.

Once set, further use should be quick and easy
Tru-Tension Chain Tensioning tool - Verdict
Don't expect the Tru-Tension Chain Monkey to take all the work out of tensioning your chain. You'll still need to have the right tools, the right settings, and the right technique to measure your chain, recognise that adjustment is needed and adjust the chain, but it will take some of the guesswork out of the process.
Maybe I was expecting a little much from the Chain-Monkey, but I can't help feeling that it introduced more work on its initial use. For commuters and high mileage riders, it will no doubt provide some time savings and reassurance that adjustments are consistent, but for weekend riders, I think the traditional methods will prove just as effective.