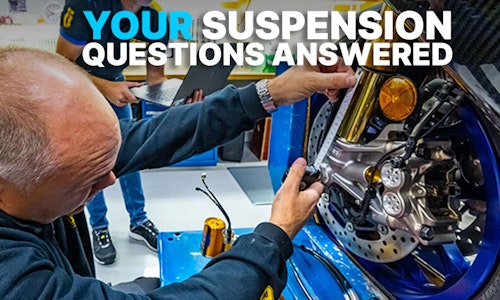
How to maintain and rebuild motorcycle brake calipers


By John Milbank
Consumer Editor of Bennetts BikeSocial
21.01.2020


The brakes are the most important part on your motorcycle; it doesn’t matter how fast you can go if you can’t stop. Maintaining your bike’s brake calipers is vital to having them work safely and at their best, so our simple guide will show you how to look after them, and how to rebuild when the time comes.
We asked Nick Nomikos from The Two Wheel Centre in Harpenden to take us through every step of the process; he’s putting aside his specialist tools and only using equipment that most home mechanics are likely to have. Once you know what to do and what to look out for, armed with a Haynes workshop manual you can tackle almost any job on your motorcycle, saving you money while giving you the satisfaction of being able to look after your own machine…
How do I maintain my brake calipers?
The six-piston Tokico calipers fitted to my 1999 Kawasaki ZX-6R are famously bad. When they work, they’re fine, but they can very quickly start binding as corrosion builds up behind the piston seals, pushing the rubber out and preventing the pistons from returning.
Keeping your calipers clean is important, but you should also regularly clean and grease the pistons. To do this, DO NOT push the pads back into the caliper – just unbolt it and slide it off the disc. You can then remove the pads and get to the pistons to clean them. Check that the pads are in good condition, with plenty of life left in them.


Apply some red rubber grease around the pistons after cleaning
Using brake cleaner, clean all of the exposed piston and up to the seal, then apply a smear of red rubber grease to the same area. Don’t slather it on as you don’t want it getting on the pad face.


Brake piston pliers can make it easy to rotate the piston when cleaning it
A really handy tool to have for this job is a set of brake piston pliers – these can help you rotate the pistons for cleaning; I bought myself the Draper Expert 30838 set.
Make sure that the pads go back in the same position as they came out, otherwise they’ll have to bed to the disc again. Then pop any spring and the retaining pin / clip back in (after cleaning them too).
Check the Haynes manual for the required torque of your caliper bolts then refit them; on this bike, they’re 34Nm.
Expert tip: Fitting new pads
“When fitting new pads you’ll need to push the pistons back in a little to make space for the thicker material,” says Nick Nomikos. “It’s really important that you clean the pistons BEFORE pushing them back, and apply some red rubber grease.
“The reason brake calipers on cars don’t typically suffer these problems is that the pistons have rubber boots over them.
“If your bike’s brakes aren’t working well, and the fluid is fresh and well bled, it could be that the wrong pad material has been fitted – if your bike is meant to use sintered pads, organic pads will pass an MoT, but they won’t bite as well.”

Your brake pads must be clean, and when you take them, out look for uneven wear; these are shiny on one side, which shows they haven’t been biting evenly. People worry about ‘glazing’, but this isn’t to be confused with polished wear; if your brake pads are glazed, they’ve been seriously overheated and will show signs of crazing or cracking; the solution is to replace them, and also find out why they’re getting that hot; are you dragging the brakes a lot, and are the pads the wrong material? Don’t try sanding them; it’s a waste of time and potentially bad for your health.
How long should my motorcycle’s brake calipers last?
If you look after the calipers, you should just rebuild them based on the recommended service intervals – every two years in the case of this bike!
How do I know when my brake calipers needs servicing/replacing?
When I got this bike home it would hardly move after applying the brakes; there was obviously a serious issue, but properly maintained brakes shouldn’t ever get to the state that you can feel a problem; that’s potentially dangerous.
If you’re buying a bike, you can check the calipers by getting the wheel off the ground then turning the wheel, feeling and listening for drag. Try applying the brakes, then let go and see if the wheel frees up again; if they don’t come off cleanly, you’ll probably need to put some work in.

Wemoto offers everything you need to maintain your bike
What parts do I need?
If your calipers have been well maintained, a rebuild should just require a seal kit. You can get a complete seal kit for both pairs of six-piston calipers from Wemoto for just £35, so it’s not an expensive job. If you’re working on the rear caliper, a seal kit costs just £14. The sets, made by TRK braking include:
Wiper seals
Dust seals
Caliper joint seals
Stainless steel bleed nipples
Bleed nipple covers
Copper banjo washers
Red rubber grease
The brake pistons might be corroded, in which case they’ll need to be carefully cleaned with wire wool, but if they’re too badly damaged, they should be replaced. Fortunately, Wemoto supplies replacement stainless steel TRK pistons that come with a lifetime guarantee; if you’re doing a full rebuild of your calipers, they could be well worth the investment. Original Kawasaki front pistons cost £38.28 each, while a TRK one costs just £19.99 and includes its two seals.
You can buy the complete seal kit and all 12 pistons to fully rebuild both ZX-6R calipers from Wemoto for just £168. If you bought that lot from Kawasaki, it’d cost over £340!
Always check the model of bike you have (and make sure the calipers fitted are the right ones for that machine if it’s second-hand) to be sure you order the right parts.


What tools do I need?
This article isn’t intended to be all you need to work on the brake calipers on any motorcycle. I’m basing it on my 1999 Kawasaki ZX-6R, but your bike will have its own unique needs, so I thoroughly recommend buying a Haynes workshop manual first. My hope is that this will give you the confidence to take on the job for yourself, but only with a workshop guide specific to your machine will you have the correct procedure. Remember that Bennetts customers can save a massive 40% on Haynes manuals at Bennetts Rewards. You’ll also need the following…
Socket set
Hex-drive sockets
Torque wrench
90° Pick
Pliers
Caliper piston pliers
Wire wool and wire brush
Small drill-bit
Protective gloves
How do I rebuild the brake calipers on my motorcycle?
You should always take care when working on any area of your motorcycle, but especially on the brakes. Read through this guide and your Haynes manual, and take your time; if something’s not going right, take a break and think. Don’t ever do any work on your bike for the first time when you have a deadline; you don’t want to be rushing anything.
Note that some bikes use different sized pistons in the calipers, so check carefully when you remove and reinsert them.

I’d stripped the full braking system off the bike, so a tyre lever was used to stop the pistons popping out. You’d usually leave the calipers on the bike until the lines were off and the two halves loosened as it’s easier to slacken everything.
Step 1: Drain the fluid and loosen the caliper joining bolts
Before starting work, and with the calipers on the bike, apply the brakes to make sure all the pistons have moved out as much as possible and the pads are touching the disc.
With the calipers still on the bike, remove the banjo and carefully drain the fluid out into a suitable container. Don’t get it on any paintwork, and wash any spills immediately.
Unless your bike has monobloc calipers, or pistons on only one side, loosen the bolts that hold the two sides of the caliper together.
You can also remove the bleed nipple at this stage – be careful doing it as they can snap if they’re seized in. If it is stuck, leave it in for now then use a little heat when the caliper is removed but remember that brake fluid is flammable. Be careful, and if in doubt, take it to a pro.
You can now remove the calipers ready to start work.
Note that on single-piston calipers, you can use the hydraulic pressure to push the piston all the way out, but do it carefully and with plenty of protection as you don’t want any fluid getting on the bike (or you). You could do it within a clear bag, for safety.


Most of the piston came out with the piston pliers, but one required pliers to pull it clear. The piston wasn’t going to be reused.
Step 2: Remove the pistons
Remove any retaining pins and springs then take out the pads. Watch for hidden R-clips as some calipers use two. The pin might have to be driven out from one side only, so check first. If it’s seized in, you may need to apply some gentle heat, remembering that brake fluid is flammable.
If you have monobloc brake calipers, you’ll need to push the pistons all the way back into the caliper body in order to get the tool in to remove one side then the other (watch for any remaining brake fluid jetting out). You’ll also need those brake piston pliers, and you’ll have to hope the calipers aren’t as bad as these old ones, as it’s a lot harder to get at them. Fortunately, modern radial monoblocs don’t seem to seize up as badly.
If you have split calipers like these, remove the bolts and break the caliper into two halves. With luck, you’ll be able to twist and pull the pistons out with piston pliers, but some of these were more badly seized, so needed grabbing with a pair of plumbers pliers; if you have to do this, you can’t expect to reuse them. Another way of getting pistons out is with a removal tool like this one, which shouldn’t damage the pistons and could be your last resort if the pistons are really stuck in tight. It won’t work on monobloc calipers though.
On some single-piston calipers you might be able to remove the banjo then poke something through the hole to push the piston clear, as is the case on this ZX-6R rear.
Remember, with proper maintenance, none of this will be difficult.


Step 3: Remove the seals
Using a 90° pick, lift the seals out of the caliper – you can see how badly corroded these were. As soon as corrosion forms behind the seals, it pushes the rubber out, which causes the pistons to bind. Sadly, these Tokicos are prone to it.
Also remove the seal that goes between the two fluid pathways, on one end.

Step 4: Clean gunk out
Because the brake fluid hadn’t been changed in this bike for at least nine years, it’s formed a crystallised mess in the piston wells; clean it out with a cloth and some brake cleaner that’s designed to fully evaporate and leave no residue (never use petrol-based cleaners).


Step 5: Clean the fluid pathways
As the brake system has been so neglected, the old fluid has clogged up the pathways in the caliper body – you should be able to carefully poke it clear with a small drill bit held in the hand (don’t actually use it as a drill!).
The blocked hole had actually started to corrode away thanks to the rotten fluid; regular maintenance really is vitally important. If you’re ever struggling to bleed your calipers, it could be a sign of a blocked fluid pathway.


Step 6: Clean the seal seats
Spray the caliper with plenty of brake fluid and use your pick to scrape the seal channels clean. You should also use wire wool or a wire brush to clean them right out – try running the wire wool around with a small flat-bladed screwdriver.

Step 7: Clean the caliper body faces
Using a wire brush, or gently with a wire wheel, clean the caliper mating faces to ensure they’re spotless.

Before and after cleaning
Step 8: Throughly flush the calipers
Using more brake cleaner, ensure the calipers are completely clean. You can use an airline to blow them out too, though it should be filtered and not lubricated air.
Don’t worry if the metal inside the caliper is a little discoloured, especially in the bottom; it’s the fluid pathways and seal channels that have to be totally clean and free of any corrosion. Pitting inside the channels isn’t a problem as long as there are no lips or ridges.


Step 9: Fit the new seals and pistons
Rub a little red grease into the seals between your fingers before popping them into place. The TRK set from Wemoto comes with a pouch that has plenty for the job.
You can then fit the pistons; if you’re using the originals, ensure they’re thoroughly clean with no lips. You can clean them up with wire wool, but if they’re not smooth after that, scrap them. With stainless steel TRK pistons from Wemoto only costing £19.99, it’s not worth undoing all the work you’ve done by damaging the new seals with ropey pistons. We’ve fitted all new pistons to this bike.
Wipe a little red grease on the piston and, if you’ve done a good job of the cleaning, they should push smoothly all the way in.


Step 10: Fit the two sides back together
Don’t forget the seal that goes between the two fluid pathways; put a very small amount of red grease on this, but not so much that it blocks the hole. The seal must be put in the caliper side with the more recessed hole, so it won’t move when bolting together.
Clean the caliper joining bolts and put a touch of copper grease on them. Do the bolts up by hand, then start nipping them up on one side then the other, finishing them off to the correct torque (21Nm on this bike) with the caliper held carefully in a vice. If it can’t be held that way, finish tightening them when the caliper is back on the bike. DO NOT FORGET – pop a bit of BluTack on them as a reminder if necessary.

Step 11: Fit the pads
Chance are you’ll be fitting new pads now, but if not, make sure they go back on the same sides that they came out of. Also make sure the friction faces are on the inside! Don’t put copper grease on the back of the pads; it’s mineral-based so can damage rubber components.
Clean or replace the pad retaining pin and the R-clips, as well as any spring clips. If the pin sits in a well, put a little grease on the end so there’s no room for moisture to get in and corrosion to form.

Step 12: Put the calipers back on the bike
Refit the calipers and torque them up properly (34Nm on this bike). You can then fit the new stainless steel bleed nipples from the TRK kit; if you put copper grease on them, make sure it’s only at the very top of the thread. You can pop the new bleed nipple dust seal on now too.
If you hadn’t already done it, finish tightening the bolts that hold the two halves of the calipers together.
Now refit the brake line banjos using the copper washers that came with the rebuild kit. The final job is to bleed new fluid into the system; for a full explanation of how to change the fluid in your motorcycle’s brake system, click here.

If you can’t do this job yourself, your dealer will be happy to take the work on. While prices will vary, Nick Nomikos, owner and MoT tester at The Two Wheel Centre in Harpenden says he’d charge £120 inc VAT to do both calipers, with the cost of the fluid, seals and pads on top.