How to choose the best leather motorcycle kit


By John Milbank
Consumer Editor of Bennetts BikeSocial
02.01.2018


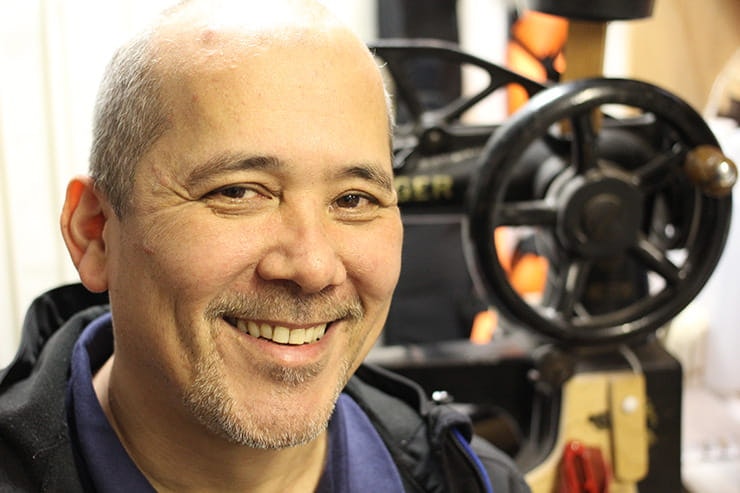
“Leather isn’t skin,” say Alan Lui of www.lincsrepair.co.uk, the company trusted by Kushitani UK to repair its customers’ crashed kit. “It is made from skin, but the tanning process completely changes it, turning it into leather.”
To recognise the best quality leather motorcycle kit, you need to understand how it’s made, and that goes right back to the animal it came from…
Leather’s leather, right?
Wrong, and that’s not just as simple as the different animals; even bovine leather is not a known quantity – one hide might have come from a cow that ate more grass from the better part of the field, or was more energetic, so more blood got around the vessels and the skin grew stronger.
Most leather used in bike kit is generally cow leather that’s come from the meat industry, and while two manufacturers might use 2mm-thick leather, and both might use top grain (more on that in a moment), they’ll likely be using different qualities, which will be determined by the grade chosen when buying from the tannery.
The distinctive smell of leather we all love so much is actually from the fat liquors used in the tanning process – the skin smells awful. First, you need to understand the two main processes involved in tanning, though keep in mind that the tanneries can alter the chemicals used to make the hides softer, stiffer, stronger, have a more pronounced grain…


The beige leather shown here is full-grain veg tanned, while the yellow is top-grain chrome tanned
Veg tanning
Veg tanning produces a stiffer, more durable leather that’s mostly used in equestrian saddles because it’s so strong – you won’t find it in bike leathers. After slaughter, the hide would be sold to the tannery.
The first step was to strip the hair from the skin using a blade, a process done with chemicals now. Raw hide will rot, dried hide will crack, so the skin needed to be tanned, here in a mixture of water and oak bark – called tannin – for nine months. Once this process had converted the hides to leather, they were oiled, which kept them flexible and prevented cracking.
Many years ago, every town used to have its own tannery, but now there are only two or three traditional tanneries remaining in the UK.
How leather used to be tanned

Watch how a traditional medieval tannery used to prepare animal skins for leather
Modern veg tan still uses tannin derived from tree bark, leaves and nuts, but it’s now considered more of a speciality process – mainstream products tend to use chrome tanning.
Modern veg tanning takes between one and three months, but leaves a tough leather that can be moulded and carved, and is more compatible with skin, so tends to be used in the horse, pet, orthopaedic and craft industries. The prime, or butt area is generally the most desirable part of the hide, followed by the shoulder, then finally the soft, stretchy belly. Saddles are usually made from the cow’s bum.
The modern veg tanning process

See how a modern American veg tannery operates
Chrome tanning
Chrome tanning is similar to veg tanning, but avoids the long process of soaking in tannin – here it’s done in a large drum with chromium and takes less than a day. It makes for a much softer leather that’s easier to work and generally used for furniture, car seats and bike kit. It’s a more fibrous leather, but the strength is mainly in the top surface; the epidermis.
As with veg tanning, the hides are delivered to the tannery soaked in salt to preserve them. After the salt is shaken out, the hair is removed in lime, which also opens up the fibre structure. Unwanted fleshy matter is cut away, then the worthless parts are trimmed off before it’s ‘skived’ – cut into layers. Then it’s tanned in a drum, before two large rollers wring it out, the leather’s graded, shaved to a uniform thickness, then re-tanned and dyed before drying.
Chrome tanning

How modern chrome tanning is carried out, and a brief explanation of bicast leather
Types of leather
Leather from a cow can be up to around 20mm thick; obviously you can’t make anything useful out of that, so it’s sliced. The fibres that make up leather are much more bound together as they get nearer the outside surface (the epidermis) – while it’s all very absorbent, the more loose fibre structures are almost like tissue paper.
Full grain leather
Full grain leather is the true epidermis that will have been dyed all the way through with an aniline dye (in the case of the very best quality hides), or is pigmented with a colour-coat across the surface. On full grain leather you can usually see the follicle holes from the hair when looking under a microscope. You’d expect to see natural marks on this leather, so the areas that are blemish free are the most expensive, and will typically be sold to high-end handbag manufacturers.
There is some full grain motorcycle kit, but it will tend to be more expensive, as only sections of cosmetically perfect hide are used. Kushitani for instance has its own cows that are maintained and used specifically for its leathers. Rolls Royce also uses specific hides for its interiors, but it’s impractical for most mainstream companies.
Top grain leather
Because full grain leather will usually have bite and barbed-wire marks on it, the leather’s top surface is sanded, then given a ‘corrected’ grain, which is typically done with heat presses or rollers, before it’s pigmented and given a polyurethane finish – a bit like a clear ‘varnish’. The strength will only be fractionally affected by the sanding process, but ultimately it comes down to the original quality of the leather.
When you look at most leather used in motorcycle kit under a microscope, it appears more like hardened, molten lava – this is the polyurethane coating over the top (it’s not a layer like that used in bicast), which is vital – without it, the leather would suck up any moisture in the air.


The black leather shown here is chrome-tanned that’s been split three times to show the fibre structure – look at the beige veg-tanned to see different the fibres are
Split leather
Split leather has been sliced from below the epidermis; like all leather, it comes in various qualities. It’s more flexible, free from surface imperfections and cheaper, but it’s not as tough as top grain or full grain.
Sometimes leather taken further from the epidermis will have a binding chemical put into it that soaks into the fibres and ‘glues’ them together, before the finish coats are applied. This is stronger than it would be otherwise, but still not as tough as the epidermis – it’s what’s often used on all but the most expensive car interiors.
Tanneries will supply high splits, middle splits and low splits, the best quality of which can be fairly strong – it simply comes down to the standard of the hide in the first place; the more fibrous the leather is, the less abrasion resistant it will be.
Bicast leather
Bicast, bonded or PU leather, is made with split; a finishing film is bonded to the top of the fibrous leather from deeper down in the hide, which means that what you see and feel is the plastic top layer. You should never find this on motorcycle clothing – you get it in cheaper handbags and other things like phone cases or some more budget furniture.
Nubuck
This is effectively a full grain leather that’s been slightly abraded for a velvety surface that releases the really fine fibres. There are also semi-nubucks that have a light coating to help protect them, but ultimately they all need the specialist nubuck sprays.
Goat skin
Goat skin has better abrasion resistance and tensile strength than cow hide by weight, but it’s also a lot thinner than bovine leather, so tends not to be used in kit that needs to withstand sliding down the road for a long period. However – due to its flexibility – it’s sometimes found in gloves as it allows more feel thanks to its soft and supple nature..
Kangaroo hide
Unlike cow and calf, kangaroo skin doesn’t have sweat glands or erector muscles and the fibres are much tighter, the weave more uniform, and the fat content minimal. Kangaroo hides have a highly uniform fibre structure throughout – from epidermis to the lower flesh – whereas cattle fibres run in all directions. These characteristics lead to kangaroo leathers having great tensile strength and high abrasion resistance, even when split.
Kangaroo leather is naturally thinner, lighter and stronger than cow hide with ten times the tensile strength of cowhide, and 50% stronger than goat skin
Fish leather
Some tanneries are even making leather from fish skin now; it’s generally used on small bags and shoes – don’t expect to find it on bike kit!
Foiled leather
Foils are a fine layer over the top of the leather that can give it a metallic or other specialist finish – even flip colours. These don’t affect the performance of the leather – it’s purely aesthetic.
How do you choose good quality bike leathers?
Alan has repaired leathers from many different manufacturers; “Choosing the best kit isn’t as simple as saying ‘this brand is great’; they all make leathers for a range of budgets, and of course they can buy varying quality hides for the construction.
“At the end of the day, you’re buying leathers to stop the cheese grater road from working its nasty stuff on your skin and bones. If you buy something sub-standard, it might save you some money, but if they come apart in a crash, it’s the wrong time to regret it. Look at the construction, even the quality of the dyes – if it looks and feels a quality product, it’s a safer bet than something you’ve chosen just because it was cheap.
“To a degree you get what you pay for – if a set of leathers are cheaper, the manufacturer will generally have to have made some savings somewhere, be they simply economies of scale, or a lower quality construction. As a rule of thumb, if it looks nasty and it feels nasty, it most likely is nasty.”

A large back panel is stronger, but it makes for more expensive leathers
Leather quality
When it comes to the leather itself, the best bet is to touch as many different products as you can – get your hands on the high-end stuff, like Kushitani, Hideout etc – for an idea of how it feels. It’s no good comparing the leathers you’re looking at to a veg-tanned saddle; by now you know that it’s a very different material.
Have a look inside the leathers – how well is the garment put together, and how tough is the back of the leather? It’ll be more fibrous than the outside, but it should still be tough.
“The biggest problem is that leather is a real unknown quantity,” says Alan. “Even leather salesmen don’t always understand the real differences… I once got thrown out of a furniture store after arguing that something being offered as a full aniline (no topcoat) leather sofa was actually micro-pigmented, and worth far less.
Stitching
Fewer panels tend to make for a tougher garment, but it also makes it more expensive as it’s harder to find large enough sections with no damage and a consistent thickness – a single hide from the tannery will have thinner areas dotted around it that would reduce the strength of your kit, so they need to be avoided. It’s why jackets with a single back panel are usually more expensive than those with a seam down the spine. The more panels there are in leathers, the more offcuts can be used by the manufacturer, and the cheaper they can be made.


It’s normal to be able to see the stitching in a leather suit, but if you can pull the panels apart, it’s a bad sign
Pull the kit around – don’t be afraid; if the shop doesn’t like you doing that, what do they think’s going to happen if you crash? If you pull the leathers at the seam you’ll often see where the stitches are, but if it looks like the gap is starting to widen, leave them on the hanger – the thread can act as a saw, cutting the leather as it moves.
These are the stitches you’re most likely to come across in bike kit…

A single stitch is unlikely to be seen on bike leathers as it’s relatively weak
Single stitch
A single stitch is only as strong as the thread – if that bursts or abrades, the leather will come apart. This shouldn’t be found on key impact or stress areas. Where two pieces butt up against each other, this might be reinforced with an adhesive tape on the back, to help stop it pulling apart.


A French seam has a reinforcing panel sewn on the back
French seam
This is a single stitch, with a reinforcing panel stitched through the outside, to the back. It’s still vulnerable to abrasion, but it has an improved pull strength. On some products, the two parallel runs of stitching can be decorative only – if there’s no reinforcing layer beneath, the seam is still only held with one stitch.


A double stitch joins the leather panels with two rows of stitching, one of which is hidden beneath a fold
Double stitch
Here the two pieces of leather are effectively sewn facing each other, before the upper layer is folded back and sewn down – this means the key joining thread is hidden behind a layer of leather, so isn’t vulnerable to abrasion.
When looking for this, or a triple stitch, make sure you look for the ‘hidden’ stitch under the fold, as well as the exposed ones.


Triple stitching adds another row of thread that’s hidden away
Triple stitch
Similar to a double stitch, but there’s another run of stitching holding the leather in place, making the seam highly resistant to both burst and abrasion.
There’s no single answer to what makes the best bike leathers, so take your time and buy the best you can afford, but remember that fit is really important too; if leathers are too loose, the armour will move around, potentially making it useless.
The energy absorbed by that armour also increases the abrasion resistance of any outer material, and saggy leathers can bunch up and tear much more easily; it’s why Kushitani’s UK boss, Jonny King says that “safety begins with a perfect fit”.
Motorcycle leathers and the new CE standard
From 21st April 2018, all new motorcycle kit sold will have to be CE-approved. Briefly, this means that the entire garment will have to meet one of a group of classifications – AAA (the highest) down to C, which is for mesh under suits with armour.
The directive is yet to be agreed so it’s currently in draft form (prEN), but the new standard is arguably less intensive than the current CE Level 1 and 2 for Personal Protective Equipment (PPE). An A-graded leather suit will potentially offer much reduced performance compared to an AAA-rated one, so understanding how your leathers are made is still vitally important.
As the UK is such a relatively small market, this will apply in Britain regardless of Brexit, and with the BSi working closely with the European markets to ensure the UK is still a viable exporter as well as importer, there’s no reason to expect our stores to be any different.
As consumers, we’ll be able to better check the safety of the products we’re buying, though some are concerned that it’s the thin end of the wedge, and will later lead to a legal requirement to wear certified kit when riding, as is already the case with gloves in France for instance.
Thanks to Alan Lui of Lincs Repair www.lincsrepair.co.uk